Regulator manual
Mancraft Regulator instructions and maintenance:
Mancraft regulator is designed to reduce and regulate pressure. It can be used with SL/UL and HPA tank. You can choose one of four output fittings:
- standard QD
- QD in EU version
- L- shape 4mm
- L- shape 6mm
Unboxing:
Mancraft Regulator in carton box with imprinted logo and contains:
- Mancraft Regulator
- 4mm allen bolt (HPA tank pin adjust screw)
- soft spring for upper part
- socket (skid) for soft spring
Installation:
Turn regulator knob counter-clockwise before installation to prevent tank from depressurise.
To install regulator on the tank you must align thread on regulator with thread on tank and turn it clockwise until it's set. To prevent thread from wear-out use grease.
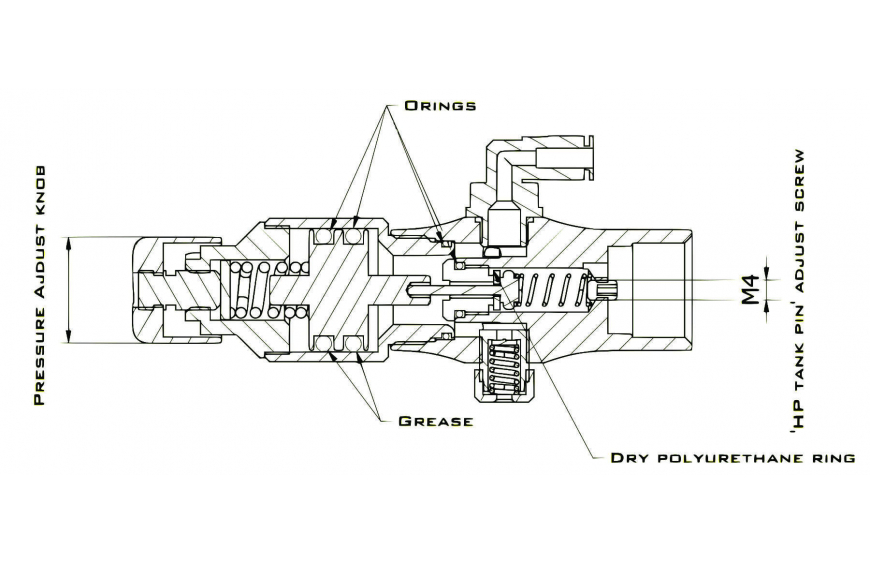
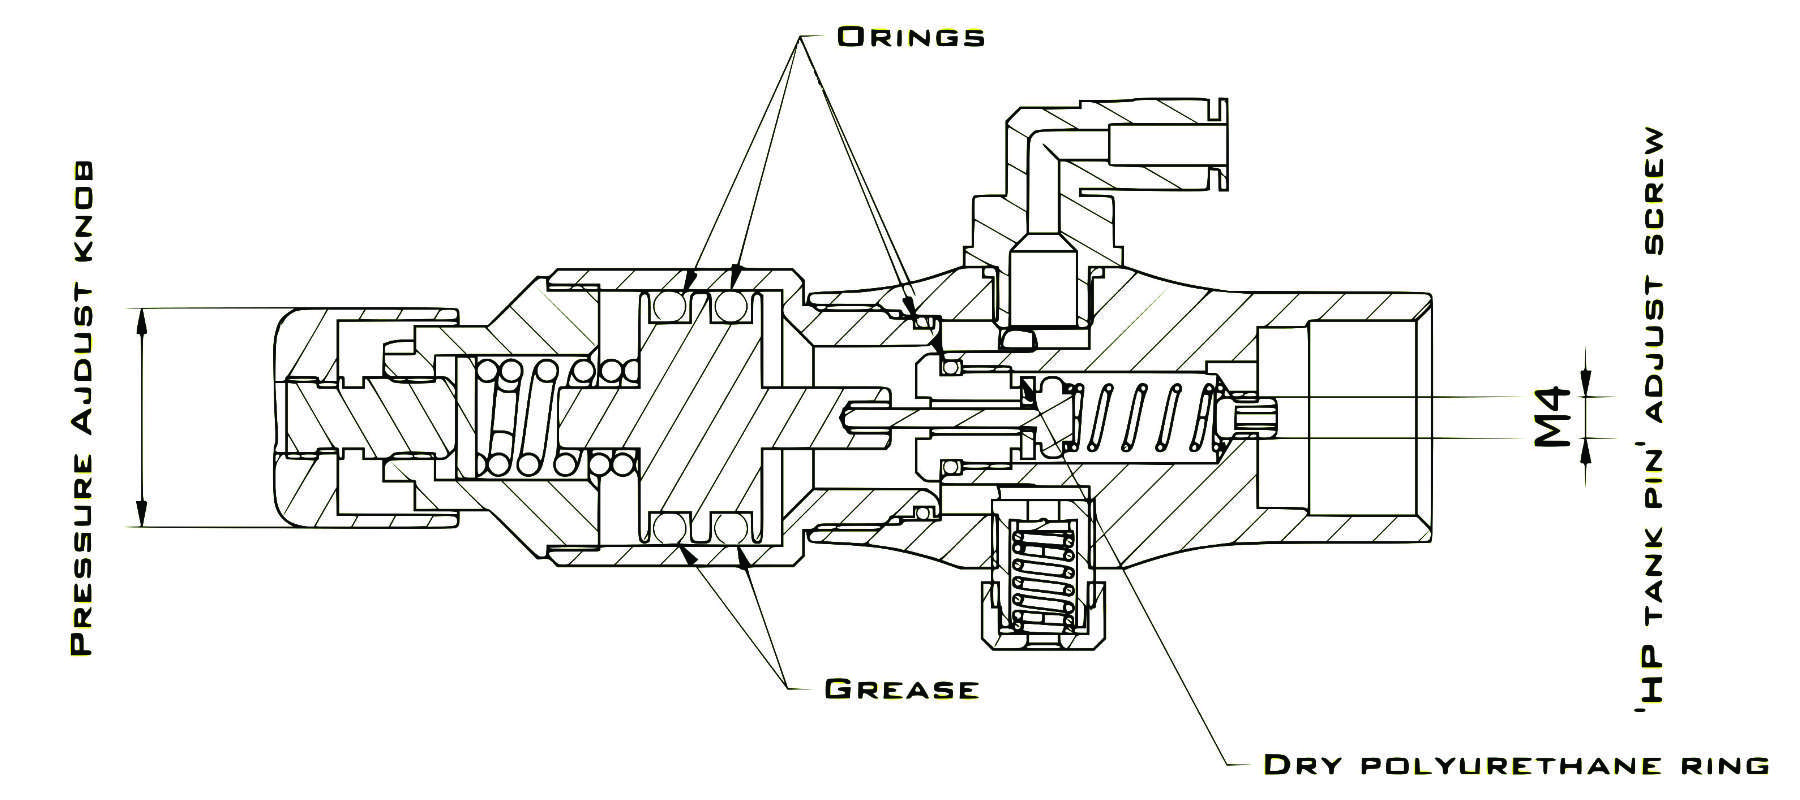
If your HP tank is pin opened screw 4mm bolt (from set) to regulator base. Regulate height of the bolt so it can push pin on the tank. Usually it should be out for 1-2mm
Pressure adjustments
Connect hose fitting on the regulator. Turn regulator knob clockwise to increase pressure or counter-clockwise to decrease. Control pressure using regulator manometer. Regulator works on pressure between 0-15 bar (0-220psi). Do not exceed 15bar limit.
Safety valve
Brass cap on the side of regulator is a savety valve. Regulate your limit pressure by turning cap clockwise to increase or counter-clockwise to decrease. The valve will open when pressure reaches preset limit.
Maintenance
The Mancraft Regulator will require maintenance when output pressure has become less consistent. This may occur due to high cycle rates or by dirt/oil inside regulator valve.
To clean regulator:
- turn regulator knob counter-clockwise to depressurise regulator
- disconnect the regulator from HP tank and hose
- unscrew upper part of regulator by turning it counter-clockwise
- use a screwdriver with a flat head to unscrew brass regulator valve
- remove piston from the upper part of the regulator
- dry clean every part and replace seals with a new ones
- grease ONLY piston seals on upper part and knob thread
- assemble regulator
Loctite note:
All fix parts are sealed using Loctite 542 sealant. To replace this parts use original Loctite 542 following the manufacturer's instructions
HPA Tanks
We reccommend the use of HPA Tanks over CO2. Unlike C02, compressed air does not turn into a frozen liquid when running through the regulator. This makes Your shots much more consistent, and does not cause damage to seals. For your safety follow HPA tank producer recommendations.
Mancraft Airsoft
ul. Jana Pawła 13
48-340 Głuchołazy
Polska/Poland
[email protected]